What You’ll Learn
- What is BlogSync?
- How to Create an Account
- How to Connect Your CMS (e.g., WordPress, Webflow, Hubspot)
- How to Convert Your First Doc (i.e., Google Doc or Microsoft Docx)
What is BlogSync?
BlogSync transforms your Google Docs and Microsfot Word documents (.docx) into clean, web-ready HTML with these powerful features: ✅ Smart Document Conversion – Preserves formatting while optimizing for web.✅ Automatic Image Optimization – Converts images to WebP format.
✅ AI-Powered Enhancement – Generates descriptive alt text and optimized file names.
✅ Direct-Platform Publishing – Direct integration with WordPress, HubSpot, and Webflow.
✅ Team Collaboration – Share access and manage content with your team.
✅ Google Drive Integration – Import Google Docs directly from Google Drive.
How to Create an Account
- Visit BlogSync – Go to blogsync.io
- Select Your Plan or Choose Free Trial – BlogSync offers a free trial as well as several premium plans.
- Enter Your Details – Provide your name and email address.
- Create Password – Set a secure password for your account.
What You Get With BlogSync’s Free Trial
- 3 document conversions per month
- 25 optimized images per month
- 1 platform connection (WordPress, HubSpot, or Webflow)
How to Connect Your CMS
WordPress Connection
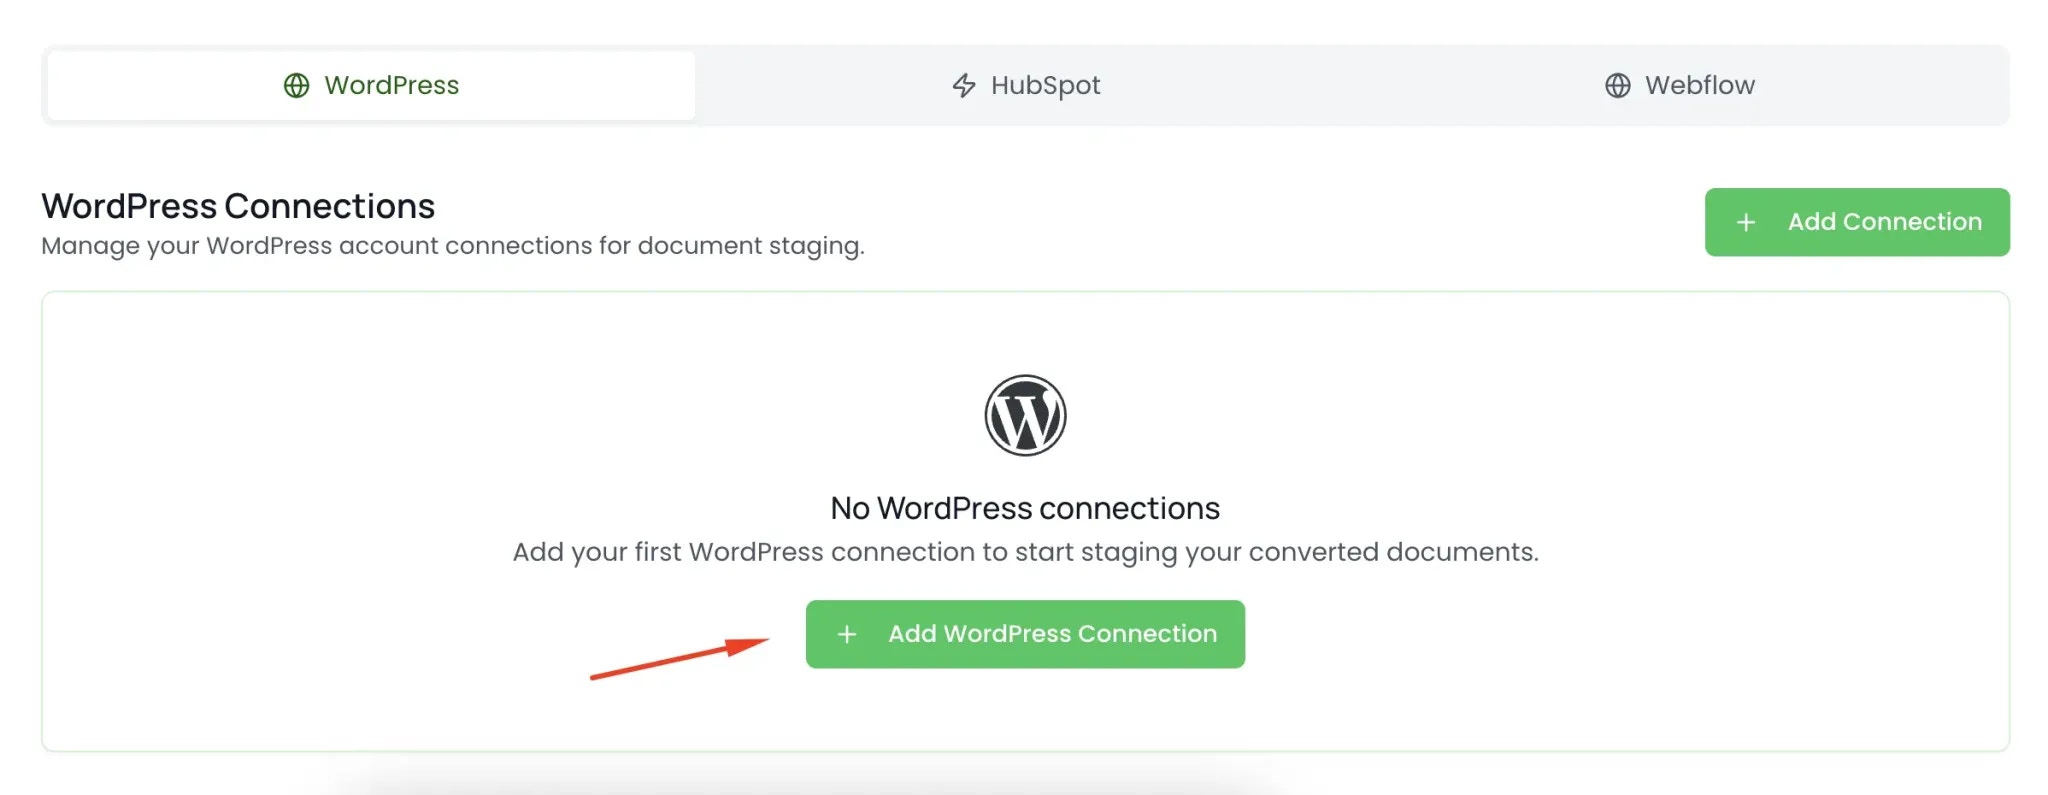
- Go to Connections – Navigate to “Connections” in Settings
- Select WordPress – Click “Add WordPress Connection”
- Enter Site Details – Provide your WordPress site URL
- Authenticate – Enter your WordPress username and application password
- Test Connection – BlogSync will verify the connection
Setting Up Your Application Password
- Go to your WordPress admin → Users → Profile
- Scroll to “Application Passwords”
- Create new password with the name “BlogSync”
- Copy the generated password
- Use this in the BlogSync connection setup
HubSpot Connection
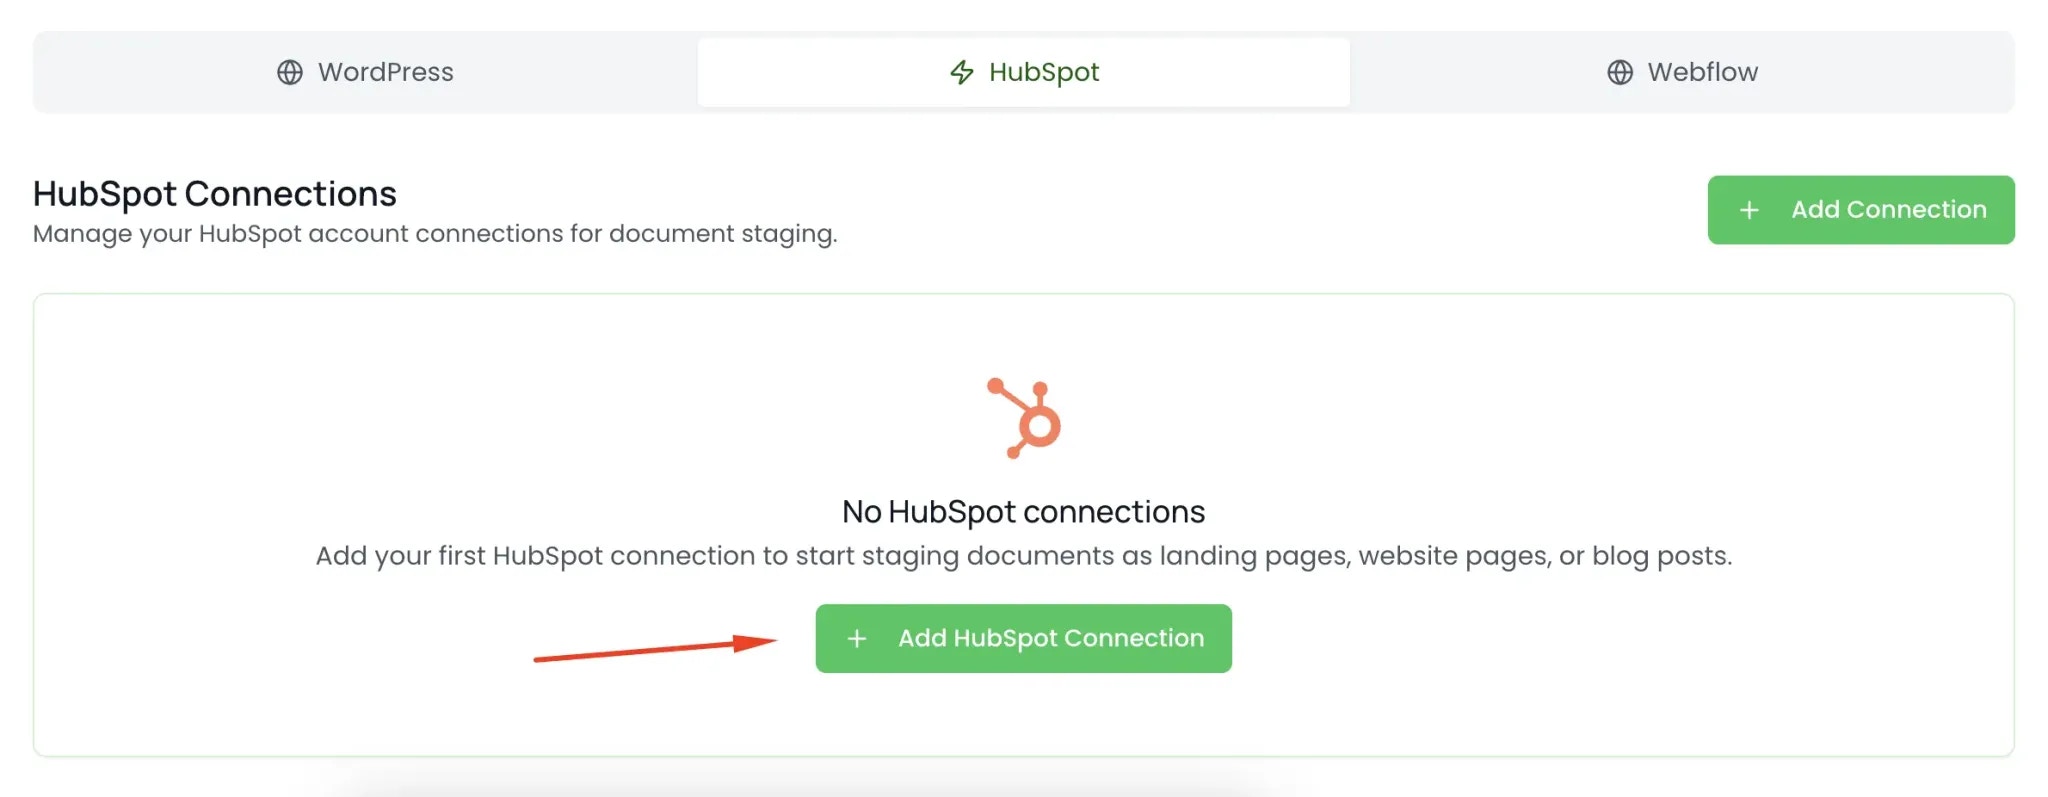
- Go to Connections – Navigate to “Connections” in Settings
- Select HubSpot – Click “Add HubSpot Connection”
- Enter Site Details – Follow the steps in the popup to connect your HubSpot website
- Test Connection – BlogSync will verify the connection
Webflow Connection
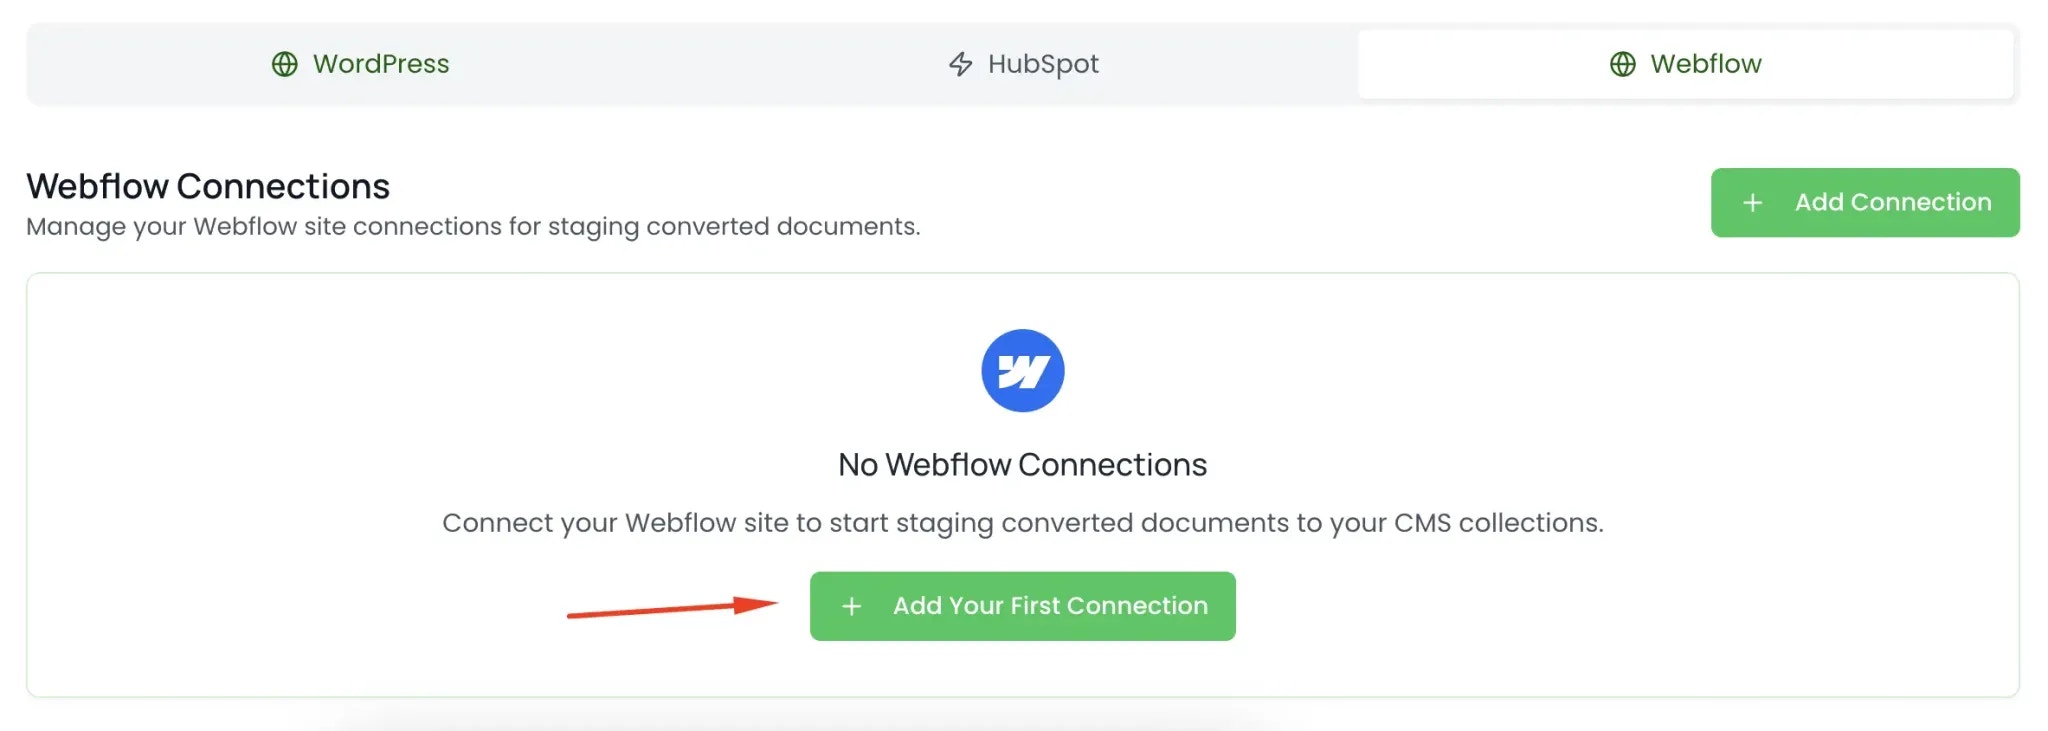
- Go to Connections – Navigate to “Connections” in Settings
- Select HubSpot – Click “Add Webflow Connection”
- Enter Site Details – Follow the steps in the popup to connect your Webflow website
- Test Connection – BlogSync will verify the connection
How to Convert Your First Document
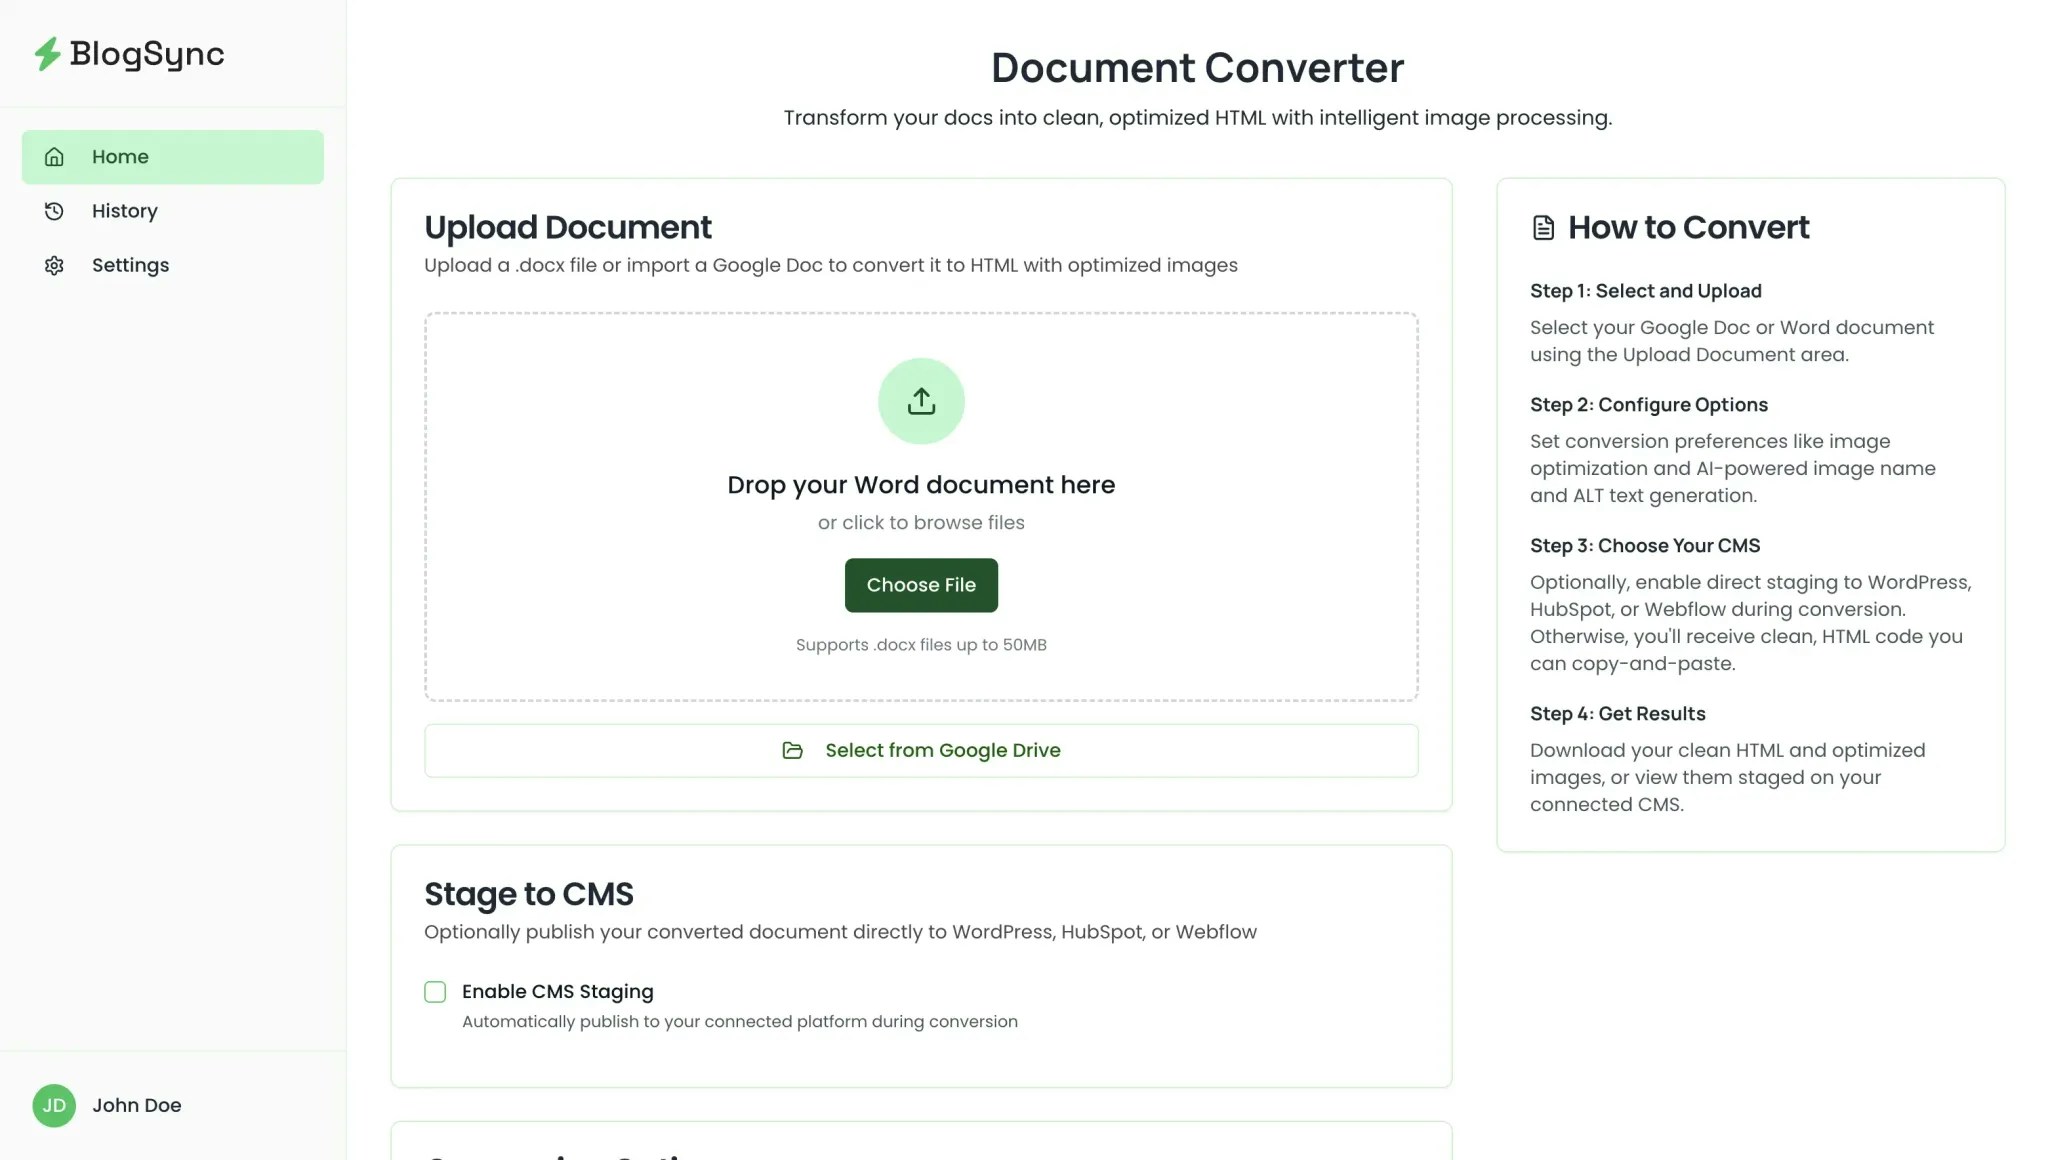
Upload and Convert
- Access Dashboard – After logging in, you’ll see the main dashboard (i.e., your Home page)
- Upload or Select Document – Click “Choose File” or drag and drop a .docx file. You can also select files directly from your Google Drive.
- Optional: Stage to Your CMS – Check the “Enable CMS Staging” checkbox to add your converted document to your connected website.
- Choose Conversion Options – By default, “Convert images to WebP format” and “Generate AI-powered image names and alt text” will be checked, but you can disable these conversion options if you’d like.
- Start Conversion – Click “Convert Document”
What Happens During Conversion
- Document Analysis – BlogSync reads your Word document structure
- Image Extraction – All images are extracted and processed
- Format Optimization – Text formatting is converted to clean HTML
- Image Enhancement – Images are optimized, and AI generates context-aware image names and alt tags
Troubleshooting
Common Issues
Document Won’t Upload- Check file size (max 50MB)
- Verify file isn’t corrupted
- Supported formats: JPG, PNG, GIF, BMP
- Check image file sizes
- Verify credentials are correct
- Check if site URL is accessible
- Ensure application passwords are active
- Large documents may take several minutes
- Images add processing time
- Check your internet connection
Getting Help
- Email: support@blogsync.io
- Response time: Within 24 hours